History of photographyIn the early stage of photography those who were developing it were interested in making a representation from virtual to reality of nature. For example, the artist Leonardo Da Vinci wanted to try this out himself by using science as his subject matter.
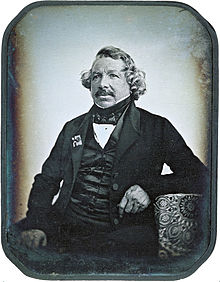
In the year 1827 a french scientist called Joseph Niepce had successfully captured a shot by using an obscura camera. He had to put a polished pewter plate covered in petroleum inside the box of the camera to get the result and the photographic process was known as "bitumen of judea". Meanwhile, Joseph Niepce teamed up with a French artist known as Louis Daguerre to try and make the photographic process better .Sadly, Joseph Niepce had passed away in 1833 and he left all the notes that he had done to Louis Daguerre meaning he had to do the job on his own. Six years after Joseph Niepce had died Louis had created a new process named the "daguerreotype" and as result the photographs were clearer than ever. Also, In England a British inventor Henry Fox Talbot was developing his own photographic process and it was a "calotype". The result was on a translucent paper and it gave a negative image instead of using a metal plate. However, the negative print could be changed to a positive, but he didn't have any ideas how he was going to do it . Suddenly, a man named George Eastman gave Talbot some support by suggesting that he should use the basic technology and chemicals that they used for film cameras at that time. |

A portrait of Joseph Niepce
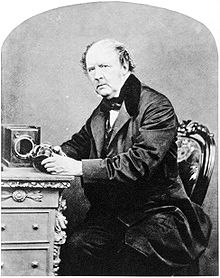
Louis Daguerre
Henry Fox Talbot
|
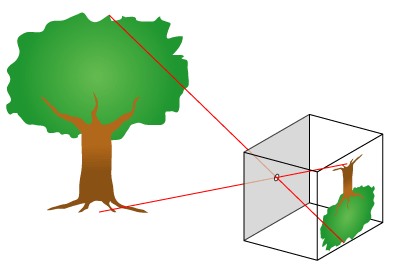
pinhole cameras taskPinhole camera is an easy camera that doesn't use a lense with a small amount of aperature on it. The outside of the camera is fully light-proof and it only let's light into it by travelling through a small hole in order to create the photograph. Although, the exposure time has to be 5-10 sec or else the picture is going to be over exposed.In order to prevent the photograph from being over-exposed you will need to have a piece of card that flips up and down right in front of the pinhole to let the correct amount of light in.
my pinhole cameraIn our first lesson of photography we had to make a small simple camera from black paper and tin foil by using glue,scissor and tape. After we made a pinhole camera I made a little door that flips up and down so my photograph won't be overexposed and i wouldn't be very disappointed. This acted as an interactive lense for my camera. In the centre of the silver part of the camera we had used a needle to make a pinhole so the light would travel into it and the picture could be taken. Also, we didn't completely shut our pinhole camera we had to open it aswell in order to put a source inside of it such as photo paper and that is why we didn't put glue or tape around the outside of the pinhole part of our camera. Although, in order to avoid an overexposed picture my class and I had to insert the photo paper in the darkroom and the size of the paper had to be 10x10cm so it could fit inside the box. We had to take a shot outside and experiment with taking a picture with our camera.
|
|
Daguerreotype cameraThe Daguerreotype is a photographic system created in France. The origin of the Daguerreotype came from a French scientist named Joseph Niepce. For his photographs he used a metal plate and covered it up with a chemical known as the “bitumen of Judea” and he waited patiently for 8 hours and the result was a huge success, which was a crucial point for photography.
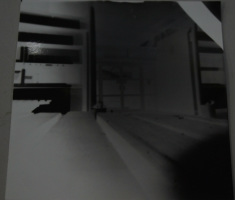
My experience with my pinhole camera and the three chemicalsIn my objective I went outside the school block and started experimenting with my camera. Alot of the times when I was doing this I was wondering around the school environment because i wanted to get a scene that wouldn't overexpose my photo-paper I needed a table so i could hold my camera stable enough to finish the process. Afterwards, i found myself a still subject right in front of the school library and i said to myself "let's give a shot" So i put my camera on a table and lifted up my paper that covers the pinhole and i held it up for 30 seconds and went back into the darkroom, but the photo went overexposed and i had to redo it again until i got the desired result. I got this shot by counting to 10 seconds for the exposure time and the result was stupendous. However, it was a cloudy day when I did this shot of it and in the picture in the bottom the weather was really bright and sunny. At first, I thought it would be the same level of difficulty as the the first one iI did, but it wasn't. Iit was a big challenge and I had no choice but to set the exposure time to a very short 2 seconds. Before I set the time to 2 seconds i thought 5 seconds would be appropriate, but it just overexposed and i was really annoyed with it. In the end I understood how it worked because you can't just rely on the timer you have to focus on the light aswell and that's how pinhole cameras work. Finally, in the darkroom there are chemicals and you have to put your photo-paper into the developer, stop and fixer.
The developer is the chemical that brings out the picture and we always have put the photo-paper inside of it for 2mins. Stop ends the developer process from and do the same thing again for 1 min. The last stage is using the fixer which lets you bring your work to the light and put the paper in chemical for 3mins and afterwards you put it in water. |
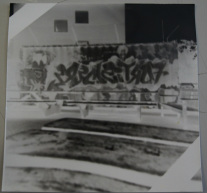
My first photograph taken by my pinhole camera
the 2 second exposure photograph
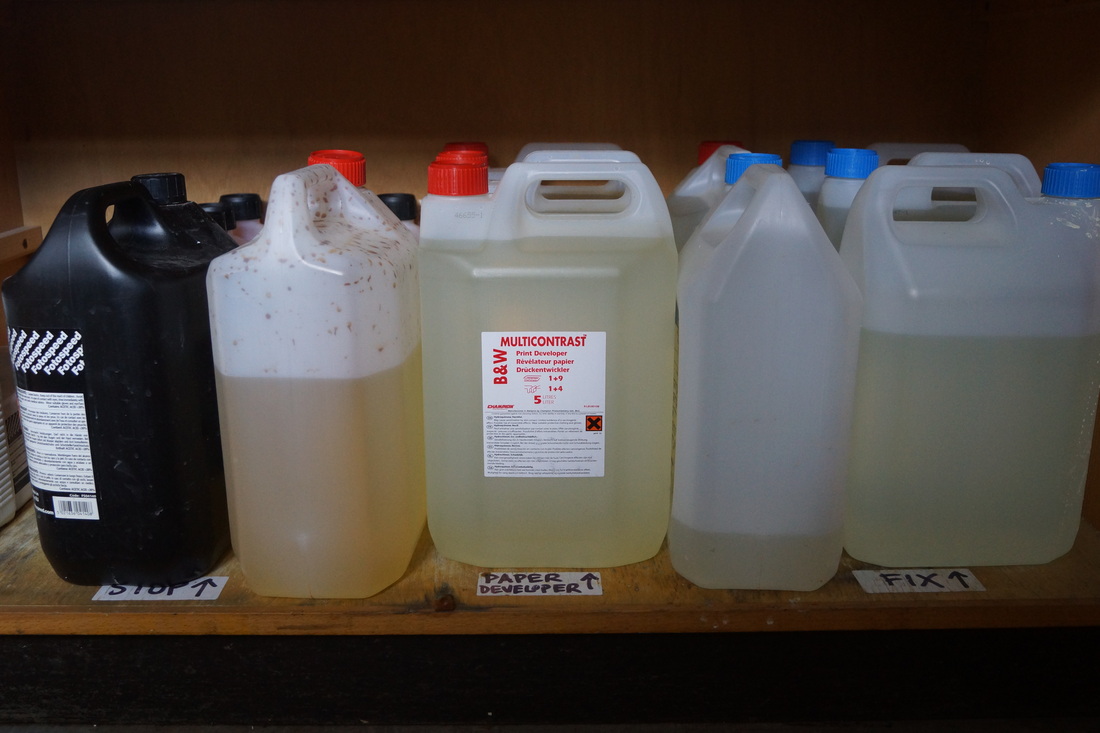
the 3 chemicals

the darkroom
|
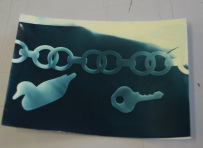
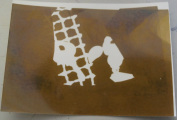
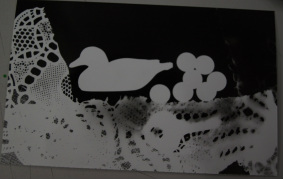
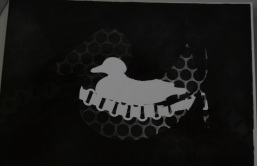
Photograms, cyanotype, solarising, burning dodging technique, changing of the negative to positive and toningPhotogram is a photographic image, which isn't produced by a camera. It is a photograph that shows an object by placing it on photographic paper and using a light source to expose it. The early stage of photogram came from England and it was created by an English inventor Henry Fox Talbot, who also started the calotype camera process. When he did this photographic work he called a photogenic drawing because he was experimenting putting a piece of fabric and leaves on a sensitised paper outdoors and the sun exposing. In 1843 a photographer named Anna Atkins had published a book British algae: cyanotype impression and it was the very first book that illustrates photographs. Anna used an interesting technique called cyanotype which was invented by John Herschel. At the end of this process the photographs would have a blue print on them. For this task I had to bring 5 small objects to school to create a photogram. In order to make a photogram you will have to use a machine in the darkroom and turn off the white light and the machine is called the enlarger. The enlarger exposes your photo. So in order to stop it becoming over exposed you need to turn the filter over the enlarger lens and set everything up such as the paper's position, placing object and a timer. In this picture i had use a duck, fabrics and some pinholes to create my own photogram. Solarisation is an interesting technique because to me most of the time people are having trouble creating this effect. Solarisation has some ironic ,beautiful and fascinating effects demonstrated by a silvery hue. I like this photographic technique because I never knew artists, scientist or inventors could do such a thing back in the 19th century. I tried to do solarising, but some parts got overexposed. However, i was quite impressed that I achieved the silver edges on it and i wasn't expecting such a good result. Next, I learned another darkroom technique called the Burning and Dodging and I thought it was going to be a difficult as the solarisation, it turns out it wasn't as hard as i expected. Basically, Dodging and burning is similar to making a photogram whereas most parts are just overexposed. I had to get my precious figurine and exposes the paper with it. This involved cutting out a piece of black paper shaped like a duck. I ended up getting this result because I placed the duck shape paper on the same place as the duck and expose it with the enlarger. When the white light beam interacts with the black paper the exposure on the photo-paper start to decrease. Normally you would see these picture with a huge amount of black because these type of photos are negative and even the pictures that i took is a negative. I wanted to change my pinhole camera photo to positive and I had to use to the enlarger once again. With the enlarger I had to get a spare photo-paper and put it behind my original photograph. For the one I did with the pinhole camera I had to make sure that the shiny side was literally behind the picture of the school library. So, I had my original photo on the front and i set the timer on the enlarger for 12 seconds and used the 3 chemicals to get the results.Although, i had to use a test strip to see in if my calculation worked.In the end, after of error that I suffered I finally got what I wanted for the 12 seconds exposing time and at first i thought like 4-8 seconds would be the answer, but I was wrong.However, i did an magnificent positive picture and i have never seen anything like it. Plus, i did another photogram with some movement effect on it. I had to use a particular item and chose a small key that i owned. In general, all i did is just follow the photogram again. I had to move the key in the same spot where I placed it in the first place, but i had change the key's angle and I made a positive print of it . After i've successfully understood the photogram I was really keen to find out more about the photographic technique.
I tried out the cyanotype skill myself and all I had to do is choose a photogram of my choice.First I had to use an optional chemical blue toner, bleach and water. I wanted to get the blue photo print and I put my photogram in the blue toner for 10mins and then I had to rinse it with water for 10mins aswell. It is possible just do the same method with the photographic print toner. In the early 1800s this photographic print toning was created by adding pigment and it was called sepia. Modern sepia is far more sophisticated than the old prints. I wanted to do the toner and cyanotype technique because I wanted to know more about how it works. I find it pretty fascinating because i am amazed that John Herschel could create this photographic print. 
the chemicals of toning the photo prints

my photogram in the blue toner

my blue print rinsed in water
my cyanotype photograph
my sepia photo
|

A portrait of Anna Atkin
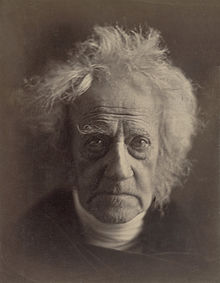
portrait of John Herschel
my experience of photogram
experimenting with solarisation
my results of burning and dodging technique
the positive picture from the pinhole camera photograph
|
The final Prints
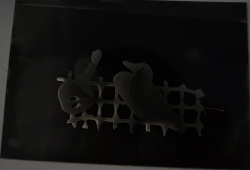
After I've learned all of the darkroom technique such as blue and Sepia toning, solarising and doge and burning,we were given a task to do our finals prints. First, I was had no idea what i wanted to do and all of a sudden surprisingly I came up with an idea. I wanted to create an underwater world with my imagination and I made this water theme because when i was young i've always like to play with water especially going to the beach and checking out strange creatures. I see fishes constantly with my dad and i use to have it as a pet, but sadly it passed away. Before I started to create these prints i had to learn two more skills called layering and weavering. Layering was when I had 2 photograms in my hand one with the fish and the other with a seaweed.I had to make some marking points of where the fishes were going to be on the seaweed photogram and i've used a knife to cut out some parts of the seaweed photo so i could actually see it. For weavering, i had to cut a photogram in pieces in a line and the other one i had to do a similar task, but not completely cut into pieces. I needed to get a ruler and a pencil so I could mark of where to cut again, but i didn't cut all the way through on one of them or else it would have been ruined it was like one the biggest challenge that i've done. After I finished with the cutting task I had to place all the pieces behind the other photogram that wasn't completely cut from the left to the other side. It needs to have some kind of up and down patterns. After I did the pattern part it kept falling apart so i had to use tape so the pieces wouldn't move about. Overall, I was impressed with the work that i did because its related to my underwater theme and sometimes when i look at the results it starts to give me the illusion that i was in the photo aswell.
The film camera experiment and prints

After I learnt all the rules of the darkroom process I was given the opportunity of testing out the film camera and I was really excited.
taking pictures and the film development
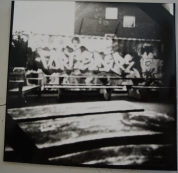
After I was given the film camera and loaded the film I had to use the tripod and test out the camera outside so I could manage to get more light from under-exposing. For starters, I used a model who was working with me as a subject and I had spend a lot of my time trying to get the camera on a right exposure so when I developed the film I could have a good photo.First, I had my camera on a tripod and I was adjusting the shutter speed and the aperture around until I had the right exposure settings. Furthermore, before we had even gone outside, the film that everyone was given had a digital number on it and the number was 400. The number indicates how much the film can handle the light with it and we have to adjust the iso to 400 on the camera aswell.
With the camera I managed to get some shots of my model on the shutter speed 1/15 sec with the aperture 4.0 and another one with 1/125 sec with f8.0. Next, we needed to go to the darkroom and develop the film with the same three chemicals, but instead of putting the film into the tray we had to place the film into a tank and spool it first before filling it up with the chemicals. |
|
Film photographsWe have to use the enlarger to see the best picture to develop. First, I went to the darkroom and exposured my film onto a big photo-paper for four seconds and i was a bit disappointed because the chemical ruined some parts of my work.
I was a bit annoyed with the choice that I made with the single model photo because the contrast of the photograph was really grey and I didn't like it. The next option that I chose was quite impressive to me because When I look at it I definitely know it was better the other one. The contrast is a mixed of black and white which is a tone that I really like. I developed these two photos because when i looked at the results I thought the photograph will looked good whereas the rest were either under or over exposed.However, I really enjoyed developing film picture because it was a big challenge. 
|

Developed film results

|
ApertureAperture is an open hole that let's light go through. In photography you can adjust the aperture level when you have your camera on Aperture priority and its a semi-automatic mode shooting mode. It allows you the change the shutter speed and even the sensitivity of light ISO from over and under exposing the photo. The aperture is being measured by the "f-number" on the camera and it has an effect of the depths of the field on the images. When you put the aperture high you'll make the hole bigger and therefore you will have more light coming through into the film and the sensor. Furthermore, when you change the "f-number" higher you'll change the hole smaller and there will be less light coming through.However, with a single lens reflex cameras you can't just rely on the camera settings. You also have focus on the lens aswell and each lens is given a mark and it tells the photographer the range of light its going to have. For example, if you went to a camera shop you will see lenses with a a writing f3.5-5.6,this is the amount of light the lens could hold even if you're using a macro,telephoto and wide angle type. Thankfully, you can adjust the aperture over the lens limit up to f22 and any other numbers you want if you have on a particular camera mode.
|


|
My experience with the aperture
In my time I used aperture priority and I went to try out the low and high aperture with my SLR camera that I got awhile ago. I went out for a-bit in the local area to buy something for my parents because they sent me out and they know that i like to walk, go out and explore a lot around in central london. Later on, I asked the shop keeper if its possible take some picture and luckily the response was yes. When I took the picture of the blue ruler I had to hold my camera steady to get a clear depth of field on the object, but i accidentally lost a bit of my grip after I changed the aperture to f22. Afterwards, at night I used a tripod so i wouldn't make the silly same mistake again by loosing my grip and getting a better result. This time I used a video game character figurine. I did this experience changing the aperture in each shot because i wanted to see If it would look like myself, I could see the results of the background start to change every time I had changed the f-number. I now understand that when the aperature is low you'll get a clear background and when you change it higher the background becomes a blur. Although, it changes the shutter speed constantly so when you have the f-number to a high digit the shutter speed becomes really slow. DSLR cameras were programmed like that because it tries to give the photographer the right exposure whereas in film you have to do the setting up of everything on your own.
Shutter speed
The shutter speed is also known as the exposure time. It is the effect of time that holds the shutter open when the light travels into sensor or film.. Before DSLR cameras existed scientist and inventors had already made a shutter speed, but it was after Joseph Niepce died. In the early days the camera shutter was 1/10s, 1/25s, 1/50s, 1/100s,1/250s and 1/500s and in digital the shutter speed there was also a feature "bulb"."Bulb" is when the user of the camera adjust the shutter speed all the way to the bottom and the instructions of the the "bulb" is that when the photographer holds down the shutter button there is a lot movement in the scenery. The picture will become a blur once you let go of the shutter button. Furthermore, theres a new mode called self timer and you can set how many seconds for your camera to take the shot and you have to be quick to make a scene or a portrait before the time runs out.
my experience with the shutter speed
During my weekends I went around the high streets and try look for objects that tend to move really fast so I could test the shutter speed myself. After I took these shots I could see that when you have the shutter speed 1/100 you won't get blurry results and the aperture get lower every time you increase shutter priority. Before I attempted to take these pictures I already knew of how the shutter speed lowers. I wanted to see what the image will look like myself. I have taken these pictures of these cars and the London underground DLR line because in my daily life when i go somewhere with my family I always see vehicles moving towards me constantly and when i was a little boy I had a habit of looking through my eyes with movement front of me and I always thought vehicles could travel like the speed of light, but I was really immature back when i was just a child. I was too young and I didn't understand. Before I took the pictures I had to bring a tripod with me so i could get a better shot with it. I went around docklands to try and look for fast movement because I was didn't find anything suitable around the local area so i tried somewhere new. In the high streets of Docklands I could see cars moving constantly and I said to myself let's test out the different shutter speed in these parts of the area. I was quite happy with the pictures I ended up with.
